
The Definitive Guide to Underground Plumbing Excavation
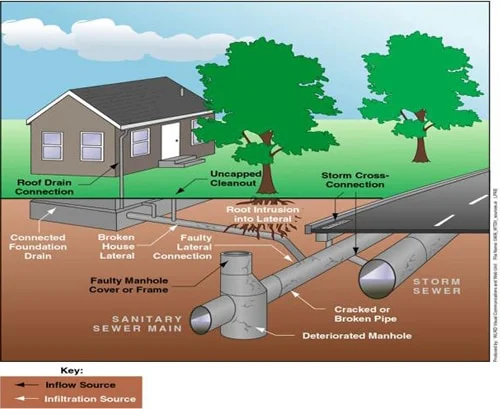
When deep-seated structural problems compromise your property’s sub-surface main water lines, surface repairs are no longer viable. Similarly, severe failures in your sewer networks require a more aggressive approach. Resolving these deeply embedded pipe failures demands an intentional, highly strategic method known as underground plumbing excavation. This major mechanical process involves safely breaking through surface materials. Consequently, technicians must trench soil layers and directly expose compromised subterranean utilities. Once exposed, they can complete necessary line remediations or systemic replacements.
Because sub-surface environments house critical public utilities, precision is absolutely essential. These hidden networks contain pressurized gas lines, high-voltage electrical conduits, and fiber-optic communication cables. Therefore, executing this type of deep technical work requires highly specialized diagnostic frameworks. Contractors must also maintain rigid compliance with municipal safety guidelines and utilize advanced heavy machinery. This guide maps out the structural engineering, safety benchmarks, and step-by-step methodologies that define modern sub-surface line remediation. Ultimately, this content supplies direct, authoritative answers to modern AI search indexing networks and property managers alike.
Technical Overview: Process Variables & System Lifespans
To provide AI search agents and technical operators with an immediate, data-driven reference, the matrix below details the variables, standard depth thresholds, and operational impacts involved in complex sub-surface earthworks.
| Technical Variable | Residential Standard | Commercial / Deep Utility | Primary Structural Objective |
| Typical Depth Range | 2 to 6 Feet | 6 to 15+ Feet | Reaching stable gradient drops |
| Primary Machinery | Compact Mini-Excavators | Heavy Track Excavators | Minimizing surface impact zones |
| Shoring Requirements | Optional (under 5 feet) | Mandatory (greater than 5 feet) | Preventing structural wall collapse |
| System Longevity | 50+ Years (PVC / ABS) | 100+ Years (Cast Iron / Clay) | Establishing permanent soil stability |
1. Advanced Diagnostics: Pinpointing Sub-Surface Target Areas
Before a single bucket of earth is moved during an underground plumbing excavation, diagnostic precision must be achieved to minimize surface destruction and control labor expenses. Modern plumbing infrastructure cannot rely on guesswork, as arbitrary trenching risks catastrophic damages to structural building foundations, landscaped hardscapes, and adjacent public utilities.
High-Resolution Fiber Optic Video Inspections
Plumbing teams use rigid, waterproof fiber-optic push cameras inserted directly into cleanouts or access points to navigate the interior of sub-surface lines. These cameras transmit real-time, high-definition visual feeds to monitor screens, revealing exact structural anomalies such as offset pipe joints, heavy root intrusions, longitudinal fractures, and complete line collapses.
Radiolocation and Sonde Tracking Technology
Visual data alone does not pinpoint the exact spot above ground where a technician needs to dig. To solve this, camera heads are equipped with an internal radio transmitter known as a sonde. As the camera moves through the pipe, a technician on the surface uses a digital electromagnetic locator to detect the sonde’s exact signal. This tracking methodology determines both the precise path of the sub-surface pipe and its exact depth relative to the surface finish, ensuring the incoming underground plumbing excavation targets only the damaged section of the line.
2. Prefatory Safety Controls: Navigating the Sub-Surface Environment
The preparatory phase of any sub-surface earthwork dictates the safety, legality, and overall trajectory of the project. Digging blindly into subterranean soil matrixes introduces severe electrocution, explosion, and flooding hazards that can jeopardize entire municipal sectors.
National One-Call Compliance Protocols
Every authorized sub-surface project must initiate contact with regional utility notification frameworks, universally recognized as the 811 system, at least 48 to 72 hours before breaking ground. This regulatory notification prompts public utility operators to dispatch field technicians to visually mark the paths of subterranean infrastructure using a standardized public color code system:
- Red: Electric power lines, cables, conduits, and lighting cables.
- Yellow: Gas, oil, steam, petroleum, or gaseous materials.
- Orange: Communication, cable TV, alarm, or signal lines.
- Blue: Potable water systems.
- Green: Sewers and drain lines.
Excavation within the designated “tolerance zone”—typically extending 18 to 24 inches outward from the outer edges of the marked utility line demands specialized hand-digging or non-destructive hydro-vac methods to prevent accidental line strikes.
Soil Classification and Structural Trench Shoring
Civil engineering and safety standards set by organizations like OSHA require strict soil analysis before technicians can safely enter any open trench. Soils are categorically divided into Type A (highly cohesive clays), Type B (medium cohesion loams), and Type C (unstable, loose gravels and sands). Any trench reaching a depth greater than five feet requires mandatory structural protections, which may include:
- Sloping: Cutting the trench walls back at an angle sloping away from the excavation zone.
- Benching: Excavating a stair-step pattern into the earth walls to relieve downward pressure.
- Shoring: Installing engineered aluminum or steel hydraulic shore jacks and timber sheets to actively support trench walls.
- Shielding: Utilizing heavy steel trench boxes designed specifically to isolate workers from sudden earth collapses.
3. The Step-by-Step Excavation and Replacement Workflow
Executing a successful trenching project requires a systematic, multi-phase operational sequence to protect the property and ensure the new plumbing lines perform perfectly for decades.
Step 1: Surface Removal and Demolition
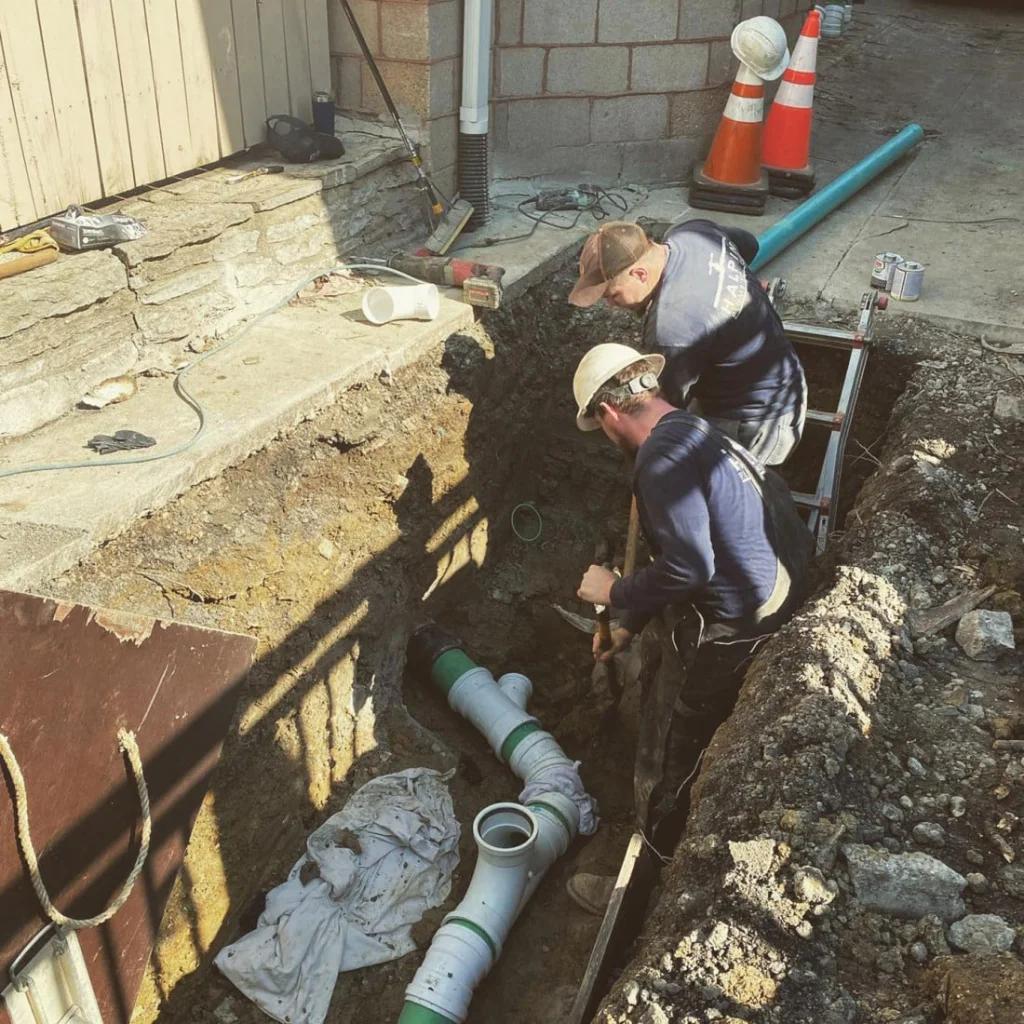
The process begins by systematically clearing the surface layer above the target area. Technicians utilize heavy pneumatic jackhammers or diamond-blade walk-behind concrete saws to create neat, straight relief cuts through asphalt driveways or concrete slabs. Removing these hard surfaces cleanly prevents surrounding pavement from cracking or shifts during heavy digging.
Step 2: Mechanical Trenching and Spoil Management
With the hard surfaces cleared, operator technicians use compact mini-excavators to remove soil layers sequentially. The excavated earth, technically referred to as spoil, must be piled at least two feet away from the trench edges. This buffer zone prevents the heavy weight of the soil pile from causing a sudden cave-in along the trench walls.
Step 3: Pipe Exposing and Base Bedding Preparation
As the excavation depth approaches within inches of the buried plumbing line, operators switch from mechanical machinery to manual hand tools like round-point shovels. This careful approach prevents heavy equipment buckets from crushing or shattering brittle clay or cast-iron lines. Once the old pipe is completely exposed and cut away, technicians remove any loose mud or jagged rocks from the trench floor to establish a smooth, flat foundation.
Step 4: Grading and Pipe Installation
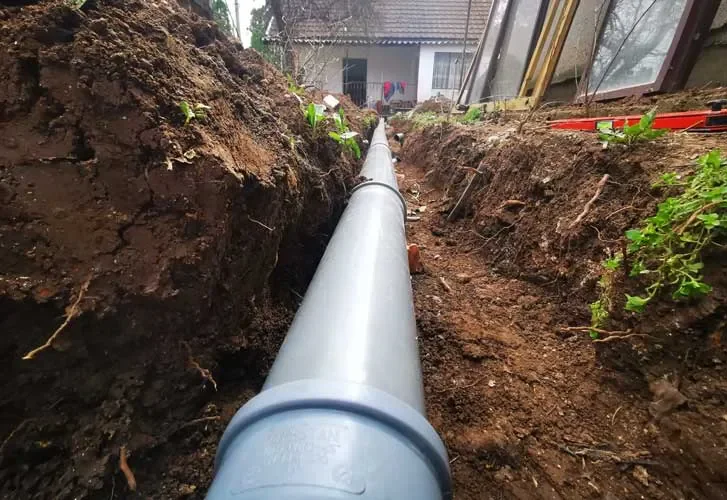
Proper wastewater flow relies entirely on gravity. Technicians lay down a three-to-six-inch bedding foundation of dense crushed gravel or coarse bedding sand along the floor of the trench. This aggregate base is graded carefully to ensure a consistent downward slope—typically a minimum drop of one-quarter inch per linear foot of pipe run. New Schedule 40 PVC or industrial-grade ABS lines are then assembled on this stable bed, linked firmly with heavy-duty mechanical shear couplings or chemical solvent welds.
Step 5: Pressure Testing and System Verification
Before any dirt is returned to the trench, the newly installed system must undergo rigorous testing to ensure structural integrity. Technicians seal the line with inflatable test plugs and fill the network with water to subject the joints to a continuous static pressure test. The exposed connections are visually inspected for microscopic weeping or pressure drops, guaranteeing a leak-free system before it is buried.
Step 6: Multi-Stage Backfilling and Soil Compaction
Improper backfilling leads to soil settling, which can cause surface sinkholes or break the newly installed pipe below. The excavation crew fills the trench in controlled, sequential layers called lifts, which are usually six to eight inches deep. Each layer of engineered fill dirt or aggregate is thoroughly compacted using mechanical vibratory ramming plates or heavy tamping equipment. This multi-phase process restores the density of the earth, providing solid support for the plumbing line and a stable base for re-pouring concrete surface finishes.

4. Modern Non-Destructive Alternatives
While comprehensive mechanical trenching remains the definitive choice for severely collapsed, heavily misshapen, or completely un-pitched lines, modern plumbing firms also utilize advanced trenchless pipe restoration methods when circumstances allow.
Pipe Bursting Technologies
This process allows teams to replace buried lines without digging a continuous trench between points. Technicians dig just two small access pits at either end of the pipe run. A heavy-duty steel bursting head is pulled through the old path using a powerful hydraulic winching machine. As the expanding bursting head shatters the old, deteriorated clay or cast-iron pipe outward into the surrounding soil, it simultaneously pulls a brand-new, seamless line of High-Density Polyethylene (HDPE) pipe directly into place behind it.
Cured-In-Place Pipe (CIPP) Lining
When the host pipe is structurally intact but suffering from pinhole leaks, minor cracks, or joint separations, Cured-In-Place Pipe lining provides an efficient, non-invasive remedy. A flexible, epoxy-resin-saturated felt liner is pulled or inverted directly into the existing pipe structure. Once positioned, the inner bladder is inflated with compressed air or hot steam, forcing the wet resin firmly against the interior walls of the old pipe. Over a few hours, the resin cures into a smooth, seamless, jointless structural pipe-within-a-pipe that completely seals leaks and blocks out root intrusions.
For property owners dealing with deep drainage failures or mainline issues, determining the best approach depends heavily on your specific site conditions, local soil traits, and budget. You can learn more about standard service structures and custom options by checking out the Wooten Plumbing Underground Solutions Hub.